Drive A Kukirin Early Testing: Complete Gameplay Guide
Master Drive A Kukirin early testing on Roblox with our complete guide covering scooter controls, rapid cash farming, quests, and customization tips.
Published: ( UPDATE) Drive A Kukirin Wiki Editorial Team
Table of Contents
Navigating the Drive A Kukirin Early Testing Build
The early testing phase of Drive A Kukirin on Roblox, developed by Gogos Games Studios, introduces players to a realistic electric scooter simulator. Unlike traditional arcade racing experiences, this title focuses heavily on physics-based riding mechanics inspired by real-world personal electric vehicle (PEV) culture. The vehicle models—crafted by community 3D artist 5asx—draw direct inspiration from high-performance brands such as KuKirin (notably the G2 and G4 series), Ausom, Dualtron, Joyor, VSETT, and Kaabo.
Because the game is officially marked as an early testing release, active development is ongoing. Players entering public servers should anticipate frequent balancing adjustments, vehicle stat changes, and occasional physics glitches when hitting curbs or landing complex stunts. Understanding how the core mechanics function during this phase will help you progress efficiently before future content expansions roll out.
In this testing phase, your main objective revolves around learning the nuanced handling model, stacking cash, and moving up through successive tiers of high-speed e-scooters. The open world provides both urban streets and expansive highways designed specifically to stress-test acceleration, sustained high speeds, and stunt stability.
Essential Controls and Stunt Mechanics
Mastering your scooter during early testing requires getting used to physics-based weight distribution. Because e-scooters have a high center of gravity relative to their small wheelbases, abrupt directional changes at top speed can throw your avatar off balance.
Tip
Practice your balance on straight highway stretches before attempting tricks in dense urban zones. Dropping a wheelie at high speed triggers a ragdoll wipeout, halting your passive income streak.
The current control scheme on PC provides dedicated inputs for movement, perspective shifts, and handlebar tricks:
Throttle and Steering (W, A, S, D): Standard directional controls. Feathering the W key allows smoother acceleration out of tight turns without losing traction.
Wheelie Initiation (Left Shift): Holding Shift shifts your rider's weight backward, lifting the front wheel off the pavement. Maintaining a wheelie requires balancing throttle input to keep the wheel elevated without looping backward.
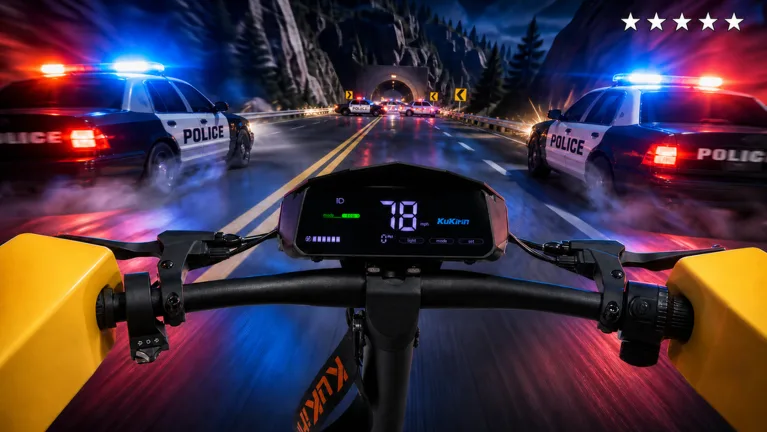
Camera Perspective (C): Toggles between the standard third-person follow camera and a realistic first-person point-of-view (POV). First-person riding offers an immersive look at the digital display dashboard and handlebars, though it narrows your peripheral vision.
One-Hand Trick (1): Removes one hand from the handlebar while maintaining forward momentum.
No-Hands Trick (2): Your rider releases both handlebars completely. This move looks stylish during highway cruises but increases steering vulnerability.
Controller and mobile button bindings are subject to ongoing refinements during the beta testing cycle, so keyboard controls remain the most reliable method for precise stunt execution.
Getting Started: Spawning and Customizing Your Ride
When you first load into the server, you will not have any cash in your wallet. The game ensures every new player can hit the road immediately through a straightforward onboarding process.
Claim the Starter Scooter: Locate the starter terminal in the main spawn area and claim your free introductory e-scooter.
Spawn from the Garage: Open your vehicle menu or interact with the garage bay to spawn your newly claimed ride onto the street.
Visit the Customization Shop: Drive over to the nearby customization garage to inspect aesthetic modification options before heading out onto the open road.
Equip Safety Gear (Optional): Click the helmet toggle in your interface to equip or unequip head protection. While helmets are currently cosmetic, they fit the authentic urban rider aesthetic.
Inside the customization garage, you can personalize the accent colors of your scooter's frame, suspension swingarms, and deck trims. Community members frequently favor bright contrast accents, such as neon green or electric blue, to make their scooter stand out during nighttime group rides. Aesthetic modifications do not alter your top speed or battery efficiency, allowing you to build a ride that matches your personal preference without sacrificing performance.
Fast Cash Farming Strategies
Generating currency in the early testing build is straightforward once you know how the payout systems calculate rewards. The economy relies on three primary revenue streams: continuous driving, quest completions, and community-reported police pursuits.
Maximizing Passive Driving Income
The foundational income source is simply keeping your wheels spinning. The game rewards you with continuous cash ticks every few seconds as long as you are moving. On the base starter scooter, you earn approximately $3 per payout tick.
Crucially, this passive tick is tied to vehicle velocity. As you unlock faster scooters capable of reaching higher top speeds, your earnings per tick scale upward proportionately. To farm passive income efficiently:
Stick to the long, multi-lane highway system encircling the map. The wide roads minimize the need to brake, allowing you to hold maximum throttle uninterrupted.
Avoid tight suburban backstreets when purely grinding cash, as hitting fences or curbs interrupts your earning timer.
Disregard rumored chat commands. Some players in public lobbies suggest using chat exploits like /set speed 100 to boost earnings or idle AFK. Player testing confirms these commands do not function and are merely community pranks.
Completing Daily and Weekly Quests
Quests represent the largest immediate cash infusions available in early testing. Relying solely on passive driving ticks makes saving for higher-tier scooters slow, whereas turning in quests grants instant lump-sum rewards.
[ ] Check the Quest tab immediately upon joining a server to review active objectives.
[ ] Prioritize distance-based daily objectives while navigating between locations.
[ ] Complete stunt challenges, such as holding cumulative wheelies for three minutes.
[ ] Claim finished quests immediately in the UI to deposit rewards (typically $400 to $500 per objective) directly into your bankroll.
Turning in just two simple starter quests can instantly inject $900 into your wallet, cutting your progression time down significantly.
Handling Law Enforcement and Stunt Bonuses
According to player experiences, encountering police elements on the road introduces a high-risk dynamic. Engaging in chases can yield additional earnings if you manage to evade patrol vehicles using the agility and narrow profile of an e-scooter.
However, getting boxed in or crashing will result in an arrest, clearing your current pursuit streak. If you choose to engage with police encounters, use alleyways and narrow footpaths where patrol cars cannot easily follow.
Scooter Progression and Tier Milestones
Your primary economic goal during early testing is moving beyond the starter model. The performance gap between entry-level and intermediate scooters dramatically impacts both gameplay enjoyment and earning rates.
Vehicle Tier
Price
Top Speed
Primary Strengths
Recommended Focus
Starter Scooter
Free
~25–30 MPH
Free claim, forgiving handling, low crash risk
Learning basic wheelie balance and completing initial quests
Intermediate Tier
$3,500
65 MPH
High top speed, elevated passive income per tick, rapid highway transit
Saving all early quest payouts to purchase as your first upgrade
High-End / Future Tiers
Varies (Beta)
70+ MPH
Advanced acceleration, sharper stunt response
Late-game cruising and group rides
The first major milestone to save for is the $3,500 intermediate scooter. Capable of reaching 65 mph, this model more than doubles your travel speed and noticeably elevates your passive income ticks on the highway.
Community consensus strongly advises against spending early earnings on optional real estate. While you may encounter suburban brick houses available for purchase across the map, their utility during the early testing phase remains minimal. Funneling all available capital directly into vehicle speed ensures you maximize your earnings multiplier first.
Map Layout and Exploration Highlights
The map featured in the early testing version of Drive A Kukirin evokes a distinctly European or British suburban aesthetic. The environment blends tight residential neighborhoods lined with brick facades, commercial storefronts, and an expansive highway perimeter.
Each sector of the environment serves a distinct gameplay purpose:
The Highway Ring: The premier location for top-speed testing and uninterrupted cash farming. Its wide lanes allow you to maintain full throttle while practicing high-speed wheelies (Shift).
Residential Streets: Feature tighter intersections, curbs, and driveways. This area is ideal for practicing lower-speed stunt transitions, one-handed riding (1), and camera toggling.
Commercial & Customization Hubs: Located near spawn, offering access to paint bays and social hangout spots for community meetups.
Troubleshooting Common Early Testing Issues
Because Drive A Kukirin is in early beta development, you may occasionally run into quirks specific to Roblox physics simulations. Knowing how to handle these situations prevents unnecessary frustration:
Warning
Physics instabilities can occur when jumping off curbs at high angles. If your scooter gets pinned under terrain geometry, use the in-game reset or respawn the vehicle from your garage menu rather than waiting for physics to resolve.
Stuck in Ragdoll: If you bail during a failed trick, your avatar may occasionally take a moment to stand up. If the model becomes permanently desynced from the scooter, open the Roblox menu and select "Reset Character."
Wheelie Over-Rotation: Holding Shift continuously without pulsing the key can cause your rear footplate to scrape the ground, instantly dumping the rider. Pulse the wheelie key gently rather than holding it down indefinitely.
Purchases Not Updating: If you purchase a vehicle or paint job and it fails to reflect in your garage, wait for server autosave confirmation before leaving the game.
Frequently Asked Questions
What real-world scooter brands inspired Drive A Kukirin?
The game draws inspiration from popular performance e-scooter brands, primarily KuKirin (such as the G2 and G4), alongside Ausom, Dualtron, Joyor, VSETT, Kaabo, Segway, and Xiaomi. The in-game 3D models were crafted by artist 5asx.
Does wearing a helmet provide gameplay bonuses?
No. In the current early testing build, toggling your helmet on or off is purely a cosmetic feature and does not reduce crash damage or alter payout rates.
Can I use chat commands to increase my scooter speed?
No. Rumors regarding commands such as /set speed 100 are completely false. Scooter performance is determined strictly by the vehicle model you have purchased and spawned.
What is the fastest way to save up $3,500 for the first upgrade?
Combine daily quest claims with continuous highway cruising. Completing your first two available quests will grant approximately $900 instantly, allowing you to reach the $3,500 requirement within a short highway cruising session.
Is Drive A Kukirin available on platforms other than PC?
While the experience can be loaded across Roblox-supported devices, specific stunt inputs like designated wheelie keys and hand gestures are currently optimized around keyboard inputs. Updated gamepad and mobile interfaces are expected as early testing progresses.